Sunday, December 19, 2010

Carrot Cake


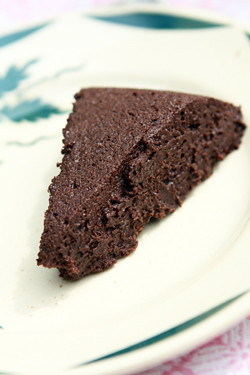
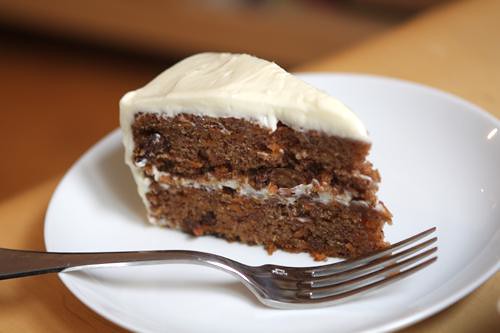
I still want to bake a cake this break
Recipe from David Lebovitz.


One 8- or 9-inch (20-23cm) double layer cake

Ingredients
For the cake layers:

4 large eggs, at room temperature
¼ cup (60ml) vegetable oil
¾ c (180ml) melted brown butter (or more oil)
1 teaspoon vanilla extract
2 cups (280g) all-purpose flour
2 cups (400g) sugar
2 teaspoons baking soda
1 tablespoon cinnamon
generous pinch each of nutmeg and cloves
1 teaspoon salt
4 cups (13 ounces/375g) loosely packed grated carrot
1/2 cup (60g) raisins, preferably golden raisins (sultanas)

For the frosting:

1 pound (450g) cream cheese, at room temperature
4 oz (110g) unsalted butter, at room temperature
2-3 cups (240-360g) powdered sugar, sifted
a few drops of vanilla extract

Directions
1. Preheat the oven to 350°F (180°C). Butter and flour two 8- or 9-inch (20-23cm) cake pans and line the bottoms with parchment paper.

2. To make the cake layers, sift together the flour, sugar, spices, baking soda, and salt. Set aside. With a handheld mixer or a stand mixer fitted with the paddle, beat the eggs until they are pale and frothy (they need not increase dramatically in volume). With the mixer running, drizzle in the oil and melted butter, then the vanilla.

3. Add the dry ingredients to the eggs and mix carefully until just combined. The paddle will accomplish this easily but if you only have a hand held mixer you may want to just do it by hand.

4. Fold in the carrots and raisins, then divide the batter between the two pans. Bake 30-35 minutes, until the surface springs back when gently touched. Cool the cakes completely before frosting.

5. To make the frosting, beat the cream cheese and butter together until smooth. Slowly add the powdered sugar (do this on low speed to avoid a dust cloud) and mix until light and silky. Add the vanilla.

Serving and Storage: This cake is best served at room temperature but will keep for a few days stored in the refrigerator.

Tuesday, November 30, 2010

Porridge!


If I had time to cook, or eat, really, I would love to make this. I'd be nice to make this for my parents as well.

Recipe from the Kitchn.

Serves 2
1 cup oat bran (oat bran is my preference, but you can also use a 7 or 10-grain cereal)
2 cups water
1 generous cup berries (fresh or frozen) or sliced, very ripe, bananas
pinch of salt
1 to 2 tablespoons honey or maple syrup
1/4 teaspoon pure vanilla extract

Toppings:
• nuts (try sliced almonds with the berries and toasted pecans or walnuts with the bananas)
• heavy cream
• flax seeds
• brown sugar (or try honey or maple syrup)
• fresh fruit
• sea salt (a sprinkle on top really pushes this over the edge!)

In a medium pot over medium-high heat bring water, pinch of salt, and half of fruit to a boil. Add the oat bran and honey and stir regularly until cereal is cooked, about 2-3 minutes for oat bran- longer for 10-grain. Serve hot, topped with suggested toppings

Saturday, November 20, 2010

Corn Muffins!


These won the Thanksgiving bread vote, so I will be making these for Thanksgiving dinner along with my turkey =)

Recipe from Smitten Kitchen.

Yield: 12 regular-sized muffins or 48 miniature ones

Ingredients
1 cup all-purpose flour
1 cup yellow cornmeal, preferably stone-ground
6 tablespoons granulated sugar
2 1/2 teaspoons baking powder
1/4 teaspoon baking soda
1/2 teaspoon salt
Pinch of freshly grated nutmeg (optional)
1 cup buttermilk
3 tablespoons unsalted butter, melted and cooled
3 tablespoons corn oil (I used olive oil since it was handy)
1 large egg
1 large egg yolk
1 cup corn kernels (add up to 1/3 cup more if you’d like) – fresh, frozen or canned (in which case they should be drained and patted dry)

Directions
Center a rack in the oven and preheat the oven to 400 degrees F. Butter or spray the 12 molds in a regular-size muffin pan or fit the molds with paper muffin cups. Alternatively, use a silicone muffin pan, which needs neither greasing nor paper cups. Place the muffin pan on a baking sheet.

In a large bowl, whisk together the flour, cornmeal, sugar, baking powder, baking soda, salt and nutmeg, if you’re using it. In a large glass measuring cup or another bowl, whisk the buttermilk, melted butter, oil, egg and yolk together until well blended. Pour the liquid ingredients over the dry ingredients and, with the whisk or a rubber spatula, gently but quickly stir to blend. Don’t worry about being thorough – the batter will be lumpy, and that’s just the way it should be. Stir in the corn kernels. Divide the batter evenly among the muffin cups.

Bake for 15 to 18 minutes (12 minutes for minis), or until the tops are golden and a thin knife inserted into the center of the muffins comes out clean. Transfer the pan to a rack and cool for 5 minutes before carefully removing each muffin from its mold.

Friday, November 19, 2010

Places to Eat in Philadelphia

I'm going to keep a list going here of places I'd like to eat in Philadelphia so I remember and check them off as I go.
  1. Village Whiskey (Burgers!)
  2. Brueggers (bagels)
  3. Manhattan Bagel (18th and Sansom)
  4. Capogiro (I've been here for gelato, but not bagels, so I'd like to try them here)
  5. Metropolitan Bakery
  6. Day by Day (I'm hoping to find pie or cake here...)
  7. Sweet Freedom Bakery (I have a coupon for her to use...)
  8. John's Roast Pork (Cheesesteak)
  9. Tony Luke's (Cheesesteak)
  10. George's Sandwich Shop (Cheesesteak - 9th and Christian)
  11. Nook Bakery and Coffee Bar (20th, between Chestnut and Market)
  12. Parc Restaurant
  13. Ants Pants Cafe (Brunch - 22nd and South)
  14. Cafe Lift (Brunch)
  15. Sabrina's Cafe (Brunch)
  16. Tacos Don Memo (Mexican - I'm not a huge fan of Mexican, so this is for Grant)
  17. Sugar Philly Truck
  18. Lyn's Food truck
  19. White Dog Cafe
  20. Must find... boba, dimsum, bakeriess and other places in Chinatown
  21. I need to find more food near Penn...
  22. More suggestions for food trucks and more food trucks
EATING. Is fun.

Thursday, November 18, 2010

Cake


Today I was struck by the random idea that I'd love to bake a plain cake and bake it well. Here are 2 recipes - one for an intense, professional buttercream frosting that sounds amazing and another for a strawberry chiffon cake that looks wonderful!

Recipes from Washington Post and Diamonds for Dessert.

Buttercream Frosting

Makes about 4 cups (generously frosts a three-layer cake)

Ingredients

1 1/2 cups sugar
1/4 cup flour
1 1/2 cups whole or low-fat milk
1/4 cup heavy cream
24 tablespoons (3 sticks) unsalted butter, soft but cool, cut into small pieces
1 teaspoon vanilla extract

Directions
Whisk together the sugar and flour in a medium, heavy-bottomed saucepan.

Add the milk and cream; cook over medium heat for about 20 minutes, whisking, until the mixture starts bubbling and becomes thick.

Transfer the mixture to the bowl of stand mixer or hand-held electric mixer. Beat on high speed until cool.

Reduce the speed to low and add the butter in several increments; beat until thoroughly incorporated. Increase the speed to medium-high and beat for 5 to 6 minutes, until the frosting is light and fluffy. Add the vanilla extract and beat to incorporate.

If the frosting is too soft, transfer the bowl to the refrigerator to chill slightly, then beat again until it is the proper consistency. If the frosting is too firm, place the bowl over a pot of barely bubbling water and beat with a wooden spoon until it is the proper consistency.

Strawberry Chiffon Cake

Ingredients
6 egg whites
1 1/2 cups sugar
4 egg yolks
1/4 cup vegetable oil
1/2 cup water
1 t vanilla
1 1/2 cups flour
3 t baking powder
pinch of salt

Whipped Cream Ingredients
4 T sugar, divided
2 cups heavy whipping cream, cold and divided
1 t gelatin
1 T water
1 pint strawberries (+ kiwis, canned peaches, etc.)

Directions
Preheat the oven to 350°F. Place the egg whites in a bowl and use an electric mixer to beat them until soft peaks begin to form. Once this happens, gradually add 1/2 cup sugar while mixing until stiff peaks form. Set aside. In another bowl, mix the egg yolks, vegetable oil, water, and vanilla together. Set aside. In another bowl, mix the dry ingredients: flour, baking powder, salt, and 1 cup sugar. Mix the egg yolk mixture with the dry ingredient mixture till smooth. Then gently fold in the egg white/sugar mixture.

Gently pour the mixture into 2-8" nonstick sprayed or parchment paper lined cake pans and smooth the tops. Bake the pans for around 25 minutes, or until a toothpick comes out clean and the top springs back when you press on it. Remove the cake from the pan and let cool on a wire rack.

Strawberries: Wash and dry the strawberries. Cut off the leaf portion of the berries. Keep a few prettier strawberries to top the cake (I kept 6 for a 6-inch cake, so if you make an 8-inch cake, keep 8 berries) and set them aside for now. Take the rest of the berries and thinly slice them.

[NOTE: In addition, you can also use other similarly textured fruit, like sliced kiwi, or slices of canned peaches with the strawberries.]

Whipped Cream: Chill two large metal bowls and your beaters in the refrigerator for 15 minutes. Place the teaspoon of gelatin and tablespoon of water in a pan. Mix and let sit for 5 minutes. In the meantime, pour 1 cup of heavy whipping cream and 2 T sugar in the chilled metal bowl. Beat on high power until you get soft peaks. Stop.

Heat your pan of gelatin and water over low heat until it turns liquid and the gelatin is just dissolved in the water (it should be warm, not hot, if hot, let cool a little). Scrape this liquid into your whipped cream. Continue beating the cream until stiff peaks form. Then stop, cover this with plastic wrap and refrigerate.

Next, in the other chilled bowl, add 1 cup of heavy cream with 2 T sugar. Beat on high until you get stiff peaks in the cream. This cream without gelatin will be used first when assembling the cake layers.

[NOTE: In the final decoration steps, the whipped cream with gelatin is used in order to ensure that the piped design keeps. If you prefer whipping all the cream in one step, just double the amount of gelatin and water and add it in after you get soft peaks while beating all the cream. (I did it in two because I prefer not having so much gelatin in my whipped cream and I like working with smaller amounts of cream at a time).]

Monday, November 15, 2010

Drawing Soap


I absolutely must have this soap.

Saturday, November 13, 2010

Pumpkin Chocolate Chip Cookies!


Ariel made some amazing pumpkin chocolate chip cookies a week and a half ago. I am attempting to replicate them with this recipe...

Recipe from Joy the Baker.

Ingredients
2 cups all-purpose flour
1 1/2 teaspoons baking powder
1 teaspoon soda
1/2 teaspoon salt
1 teaspoon ground cinnamon
1/4 teaspoon freshly grated nutmeg
1/4 teaspoon ground cloves
2 eggs
1 cup sugar
1/2 cup canola or corn oil
1 cup canned pumpkin
1 teaspoon vanilla extract
1 cup chocolate chips, or any chip you like

Directions
Position a rack in the middle of the oven . Preheat the oven to 325 degrees F. Line two baking sheets with parchment paper and butter the paper.

Stir the flour, baking powder, baking soda, salt and spices together in a medium bowl and set aside. In a large bowl, using an electric mixer on medium speed, beat the eggs and sugar until smooth and lightened in color, about 1 minute. Stop the mixer and scrape the sides of the bowl as needed during mixing. On low speed, mix the oil, pumpkin, and vanilla until blended. Mix in the flour mixture to incorporate it. Mix in the chips.

Using an ice cream scoop with a 1/4-cup capacity, scoop mounds of the dough onto the prepared baking sheets, spacing the cookies at least 2 1/2-inches apart. You could also simply use a 1/4-cup measuring cup if you don’t have a scoop. Use a thin metal spatula to smooth and flatten the rounds.

Bake the cookies one sheet at a time until the tops feel firm and a toothpick inserted in the center comes out dry, about 16 minutes. Cool them on the baking sheet for 5 minutes, then use a wide metal spatula to transfer the cookies to a wire rack to cool cimpletely.

Dust the cooled cookies lightly with powdered sugar. The cookies can be stored in a tightly covered container at room temperature for up to 4 days.

If I want to make whoopie pies out of these cookies...

Filling Ingredients
1/2 stick butter
4 oz. cream cheese
2 cups powdered sugar
1/2 teaspoon vanilla extract
1/2 cup mini chocolate chips

Directions
Mix together melted butter, brown sugar, 1 teaspoon vanilla, pie spice, pumpkin puree and eggs until smooth. Add flour, baking soda, baking powder and salt. Mix well until a thick batter forms. Drop by spoonful onto parchment lined cookie sheets. You need 24 cakes for 12 pies. Bake at 350 degrees F for 15 - 20 minutes or until toothpick inserted in center of cakes comes out clean. Cool completely and make filling.

Blend softened butter and cream cheese with vanilla. Add powdered sugar and stir until smooth. Fold in chocolate chips. Spread on 12 cakes and top each with another cake.

Oatmeal Creme Pies


I want oatmeal creme pies!!
Recipe from Marzipan.

Ingredients
1 1/4 cups butter, softened
1 cup firmly packed brown sugar
1/2 cup granulated sugar
1 large egg
2 teaspoons vanilla extract
1 1/2 cups all-purpose flour
1 teaspoon baking soda
1/2 teaspoon salt
1/4 teaspoon ground cinnamon
3 cups uncooked quick-cooking oats (I used the regular oats instead of the quick)

Directions
Preheat oven to 375°.

Beat butter and sugars at medium speed with an electric mixer until creamy. Add egg and vanilla, beating well.

Lightly spoon flour into dry measuring cups, and level with a knife. Combine flour and next 3 ingredients in a bowl, stirring well. Add oats; stir well. Add to butter mixture; stir until well blended. Drop by rounded tablespoons 2 inches apart onto baking sheets lined with parchment paper. Bake at 375° for 10 minutes. Cool on pan 2 to 3 minutes. Remove cookies from pan; cool on wire racks.

Spread 1 tablespoon Cream Filling over each bottom side of half of cookies; top with remaining cookies, right side up.

Creme Filling Ingredients
1/2 cup butter, softened
2 cups powdered sugar
1 to 2 tablespoons whipping cream
1 teaspoon vanilla extract

Directions
Combine all ingredients in a medium bowl. Beat with an electric mixer on low speed until combined, scraping bowl. Beat on high until light and fluffy.

Tuesday, November 9, 2010

More Presentation Inspiration


I really need to strengthen my presentation skills. Thus, more inspiration! This is The Cave by student Gonzalo Vaíllo Martínez.

Images from Dezeen.


Comic Presentation

Such an interesting way to present a concept... This is from the Briefcase House.

Image from Archinect.

Tuesday, November 2, 2010

Lanvin for H&M


Chances are low that I'll even be able to afford this "affordable" collaboration, but I do really like some of the pieces. A lot of them are architectural and interesting without being unwearable. Sounds like my kind of fashion...


Thursday, October 28, 2010

Chocolate Mousse Cake


Wish I had time to bake.

Recipe from David Lebovitz.

For similar results, use chocolate that is approximately 52% cacao solids and whip the egg whites pretty firm before folding them in. Line the cake plate with a clean cloth or thin tea towel. Best eaten 2 days after baking.

250 g (9 ounces) dark chocolate, coarsely chopped
45 ml (3 tablespoons) water
190 grams (7 ounces) unsalted butter, cut into pieces
3 tablespoons sugar, preferably light brown
4 large eggs, separated

1. In a medium saucepan, warm the chocolate, water, and butter over low heat, stirring, until melted and smooth.

2. Remove from heat and stir in the sugar.

3. Fill a basin or the sink with a few inches of very cold water and beat the chocolate for a few minutes until the consistency of brownie batter.

(The original recipe said “blanchiment” which I thought meant “whiten” but when she did it, it didn’t whiten, or even really lighten at all. But I’d still do it.)

4. In a separate bowl, beat the egg whites until stiff. Fold the whites into the chocolate mixture until smooth.

5. Moisten well a muslin cloth or a clean (lint free) tea towel, and line a 9-inch (23 cm) round glass or earthenware baking dish such as a pie plate, with it, letting the sides overhang the edges over the dish.

(Note: Although she normally uses and recommends a round dish, we used a square baking dish which worked fine.)

6. Scrape the batter into the dish and smooth the top. Lift the sides of the damp cloth and fold it over the batter, enveloping it.

7. Let chill for 2 days before serving.

To serve, open up the towel and invert onto a serving plate.

Friday, October 8, 2010

Handkerchief Invites


This is a pretty epic idea. These invites are printed on handkerchiefs - and the graphics are a map that help direct guests to the site. These handkerchiefs are for a wedding, but I imagine you could use the idea for any event that requires a map.

Design Sponge

Thursday, September 30, 2010

Rick Owens


Rick Owens' taupe dresses! Love the dress that's 2nd from the left.

Image from The Cut.

Saturday, September 25, 2010


I very seriously want that top (Lulu Frost Spring 2011).

Image from SheBreathes.

This is an Inspiration Pad.
I could use the inspiration...

Image from TMShop.

Thursday, September 23, 2010

Saunders


I love Jonathan Saunders! I especially love the shoes here - the tucked in ribbon and the low cut sides are wonderful, though I would want them to be less low cut in the vamp, as they look a little bit like they are hard to keep on.

Image from The Sartorialist.

Friday, September 17, 2010

Sukkah City

These drawings of Star Cocoon by Volkan Alkanoglu are wonderful. The use of color, clarity of the diagrams and the layout are quite strong. This will be future inspiration for me...

Images from Archinect.

Library Information Desk


This desk by TU Delft is made out of a old books. It's beautifully made, but I'm not sure how I feel about using books in such a manner...

Images from Recyclart.


Thursday, September 16, 2010

Marchesa Spring 2011


Such awesome clothes... the shapes!

Images from Fashionista and The Cut.


Saturday, September 11, 2010

Staircases


We're studying patterns, connections and fasteners and while these images aren't exactly related to what we are doing, these staircases have beautiful forms and the repetition is relevant.

Images from Dezeen.

Monday, September 6, 2010

Dress

This dress is by Leanne, who won Project Runway one season. She has an Etsy shop. I'd be very happy with a dress like this.

What a provocative image.

Image from A Daily Dose of Architecture.

Friday, September 3, 2010

The Mockingjay


I finished the Mockingjay today. It was a wonderful end to the series and I'm really happy that Grant gave it to me. I want to write more about it, but it's late and I'm kind of out of it, so I will need to save that for another day. On a side note, I'm glad I have this book, as I don't have the first 2 of the series and have been meaning to purchase them. When I don't feel strapped for cash as a poor graduate student, I will buy them!

Next up... Ender's Game has been recommended to me. I know they have similar names and seem to be similar sci-fi-ish books, but I'm sure it'll be a different experience and I look forward to reading it!